 bathroom
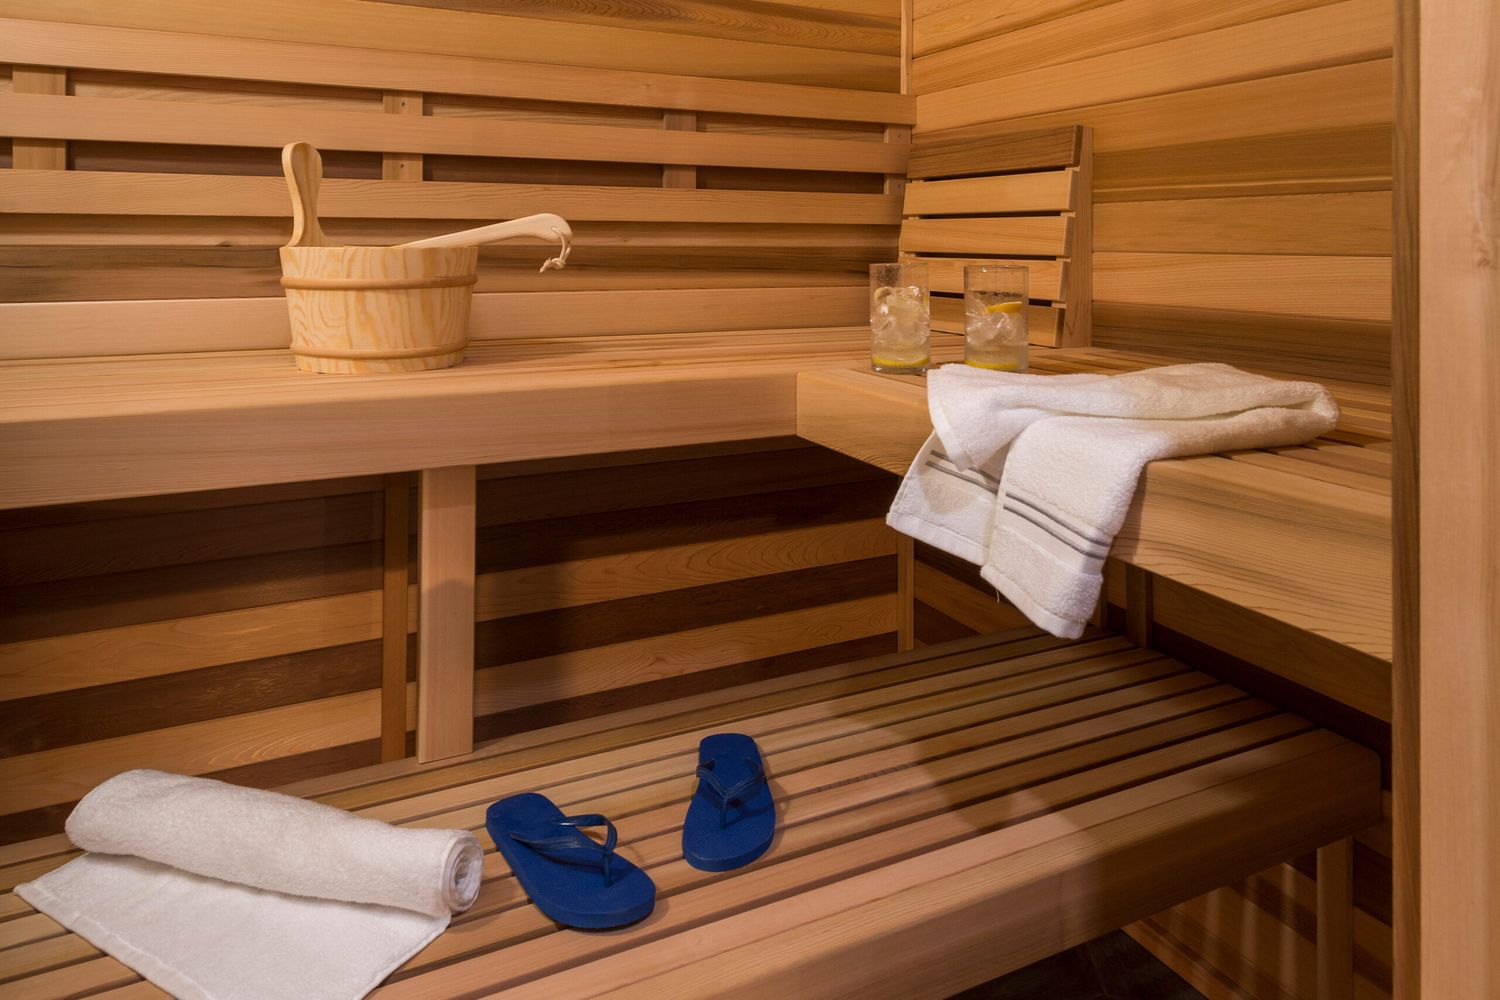
We may be compensated if you purchase through links on our website. Our team is committed to delivering honest, objective, and independent reviews on home products and services.
More
Historically linked to Finland, where people heated pits in the sides of slopes with fireplaces, hot stones, and steam, saunas can provide relief after a long day. Fortunately, you can build one of these cozy relaxation rooms at home without digging a hole in the side of a hill. Whether you’re considering an indoor or outdoor sauna, this guide will walk you through the essential steps and considerations for creating your very own tension-easing retreat.
Types of Home Saunas
Home saunas come in various styles, each offering unique features and experiences:
- Barrel saunas: These outdoor options have a distinctive cylindrical shape and are often more affordable than custom-built options.
- Infrared saunas: These use infrared heaters to warm your body directly without heating the air around you.
- Steam rooms: Some of the most common types of saunas, steam rooms provide a moist heat environment with 100% humidity.
- Traditional Finnish saunas: These use dry heat and occasional steam created by pouring water over heated rocks.
Planning Your Home Sauna Project
From the size and location to the type of heater and materials needed, consider these factors before you start building your home sauna.
Indoors vs. Outdoors
The most important decision when planning a home sauna is deciding whether to build it indoors or outdoors. You can build an indoor sauna in a closet, basement, or bathroom with the proper precautions. Since the structure, electricity, and entrance already exist, building an indoor sauna may be more feasible than an outdoor sauna.
An outdoor sauna requires a separate structure, either newly built or repurposed. An old shed might make a great spot for a sauna, but you’ll likely need to wire it for electricity (depending on the sauna type). Otherwise, you can build a sauna on a deck, on grade, on a concrete slab, or almost anywhere else that’s level and flat.
Size and Location
When choosing the size and location for your sauna, consider the following:
- Building codes: Check local regulations for any restrictions on sauna construction.
- Number of users: Make sure you have enough space in the sauna for comfortable seating.
- Proximity to utilities: Easy access to electricity and water is essential to power the sauna and to create steam.
- Ventilation options: Proper airflow helps with sauna performance and safety.
Kits vs. Custom Builds
There are sauna kits available that come with almost everything necessary to turn a shed or interior room into a sauna. However, if you’re a do-it-yourself (DIY) enthusiast eager to personalize your home sauna and want to save money on the installation, a custom sauna is worth the work. If you don’t have the necessary tools or face time constraints, we recommend a kit.
Heater Type
There are three heater types to choose from: electric, gas, and wood. Electric and gas heaters are efficient, heat quickly, and will typically require assistance from an electrician or plumber. Wood is a better option for an off-grid sauna, though wood-fueled saunas take longer to heat and the temperature is harder to control.
Materials
Saunas produce high temperatures and moisture levels, so carefully choose materials that can withstand those elements:
- Install a foil-faced vapor barrier over the insulation, overlapping seams by at least four inches. Seal all seams with foil tape to create a moisture-tight envelope.
- Softwoods, such as cedar, poplar, and hemlock, can swell and contract without cracking. Cedar is antimicrobial and smells and looks great, but it’s expensive. In a pinch, rough pine will also work, though it won’t last as long as cedar.
- Temper glass elements, such as doors and light fixtures, to prevent cracking. Any electrical boxes or devices should be rated for high-humidity areas.
- Use fiberglass batt insulation between wall studs and ceiling joists.
Budgeting for Your Home Sauna
The cost of building a home sauna can vary widely based on its size, materials, and features. Consider these factors when budgeting for the project:
- Additional features: Consider budgeting for lighting, sound systems, or custom amenities to personalize your sauna.
- Heater type: Electric, gas, or wood-burning options have different price points, with wood often costing less but requiring more of an initial upfront investment.
- Labor costs: Factor in this expense if you’re hiring a professional for construction or electrical work.
- Materials: Invest in high-quality wood, insulation, and vapor barriers to make your sauna last longer.
Tools and Materials To Build a Home Sauna
The tools required for building a home sauna will vary depending on the size and design of the structure. Here are general hand and power tools that you’ll need for the project:
- Finish nailer
- Hammer
- Level
- Pliers (linesman, pump, and slip joint)
- Power drill
- Power saws (circular, miter, and table)
- Safety glasses and hearing protection
- Screwdriver
- Staple gun
- Tape measure
Materials will also vary based on design, but you’ll typically need the following for your project:
- 2×4 or 2×6 framing lumber
- Cedar, poplar, hemlock, or pine tongue and groove paneling
- Concrete
- Electrical boxes, fixtures, and wiring
- Fiberglass batt insulation
- Floor tile and thinset
- Foil-faced vapor barrier
- Foil tape
- Nails, screws, and staples
- Sauna heater and thermostat
- Waterproof membrane
How To Build a Sauna: The Basic Steps
Building plans for a home sauna can vary, but they share basic characteristics that are important whether you’re DIYing the structure or enlisting a contractor’s help. The following steps explain the basics of how to build a custom electric- or gas-powered sauna of any size, with tips for indoor and outdoor builds.
1. Prepare the Location
Select and prepare the location. For indoor saunas, remove everything from the room, exposing the walls down to the studs. For outdoor saunas, find a flat, level spot large enough for the sauna.
The floor should be waterproof regardless of the sauna’s location. This usually means creating a concrete foundation for outdoor saunas. Concrete board, waterproof floor membrane, and a skim coat of concrete or tile typically work for indoor saunas.
2. Install the Electrical Components
With the studs exposed, run wires for the thermostat, lights, an electrical heater (if you’re using one), and any other devices you want for your sauna. Drill through the studs, run the conduit, and pull the appropriate wires for the devices. If you’re using an electric heater, make sure the breaker has enough room to handle its power draw.
3. Insulate the Walls and Ceiling
Install insulation between the stud bays and ceiling joists. Use the appropriately sized batt insulation for the stud and joist sizes (2×4, 2×6, 2×8, and 2×10 are common), as well as the bay width (12, 16, or 24 inches, on center).
4. Install the Vapor Barrier
Install the foil-faced vapor barrier over the insulation and secure it to the studs and joists with staples. Work from the bottom up, saving the ceiling for last. The upper course should overhang the lower course by at least four inches. Aim to create as few seams as possible. Where seams are unavoidable, seal them with foil tape.
5. Install the Paneling
Install the paneling starting across the ceiling. For the first board, nail through the face of the board and into the joists, ensuring that the tongue faces away from the wall. For each subsequent course, line the groove up with the previous board and nail through the tongue and into the joists. Repeat the process for each wall.
Maintain a roughly 1/4- to 3/8-inch gap around the perimeter of the ceiling and each wall. This allows for natural expansion and contraction. You can cover the gaps with small strips of paneling cut on a table saw.
6. Build the Bench
Measure the distance between two parallel walls. Build a simple frame with 2×4 stock and screws that spans the distance and measures 19 inches deep. Cut four 2x4s to 16 inches for legs. Situate the bench with a leg positioned vertically and flat against the wall in each corner. Screw the legs to the walls and then screw the frame to the wall. Finish the bench with 2×4 stock spaced 1/4 inches apart.
7. Install the Heater and Light Fixtures
Install the heater by either plugging in the electrical cord or plumbing the gas pipe. Check the gas piping for leaks, and install the light fixtures, switches, and thermostat.
8. Test the Sauna
Set the thermostat to the desired temperature and close the door. Wait the suggested amount of time before checking the temperature. Use the dipper spoon to pour some water over the heater’s rocks, and enjoy the sauna’s relaxing, steamy atmosphere.
Safety Considerations for a DIY Home Sauna
Keep these safety considerations in mind when building your sauna:
- Apply a water-resistant sealant to all wood surfaces.
- Consider stainless-steel fasteners to prevent rusting.
- Ensure proper clearances around the heater as specified by the manufacturer.
- Include vents near the floor for fresh air intake and near the ceiling for exhaust. Consider an adjustable vent for better control.
- Install ground-fault circuit interrupter (GFCI) outlets and use electrical components rated for high-humidity environments.
- Slope the floor slightly towards a drain for water runoff.
- Use tempered glass for any windows or doors to prevent cracking under heat stress.
Maintenance and Care for Your Home Sauna
Proper maintenance will keep your sauna in top condition for years to come. Scrub benches and floors with a mild soap solution after each use. Rinse thoroughly and allow the sauna to dry completely before you use it again.
Inspect the wood regularly for signs of wear or damage, and clean or replace sauna rocks as needed. Check electrical connections and heater elements annually or any time you notice a problem.
Source: https://www.thisoldhouse.com/bathrooms/22948993/home-sauna
You may also like

